

Top 7 Mistakes in selecting Equipment Sampling Locations
7 Critical Mistakes to Avoid When Selecting Equipment Sampling Locations for Cleaning Validation
In pharmaceutical manufacturing, selecting appropriate equipment sampling locations is critical to ensuring the effectiveness and compliance of your cleaning validation program. If done incorrectly, it can result in regulatory non-compliance, product contamination, and serious operational setbacks.
Despite its importance, many teams still fall into common traps when identifying where to sample. In this article, we explore seven key mistakes that can undermine your cleaning validation efforts—and outline best practices to avoid them. You’ll also find practical tips to enhance consistency, risk mitigation, and audit readiness.


Mistake #1: Skipping Comprehensive Risk Assessment
One of the most significant oversights in cleaning validation is the failure to conduct a thorough, structured risk assessment when selecting sampling locations. Teams often default to familiar surfaces without evaluating whether they represent the most difficult areas to clean.
Without assessing equipment geometry, surface characteristics, accessibility, and cleaning method compatibility, you risk overlooking critical sampling points that may harbor contaminants. An in-depth evaluation should encompass factors such as dismantling complexity, cleanability, accessibility, and detectability. For example, using a risk matrix, a hopper could have varying Risk Priority Numbers (RPN) based on its design complexities and cleanliness challenges – such as an RPN of 256 for one hopper configuration versus a different score for another based on these criteria.
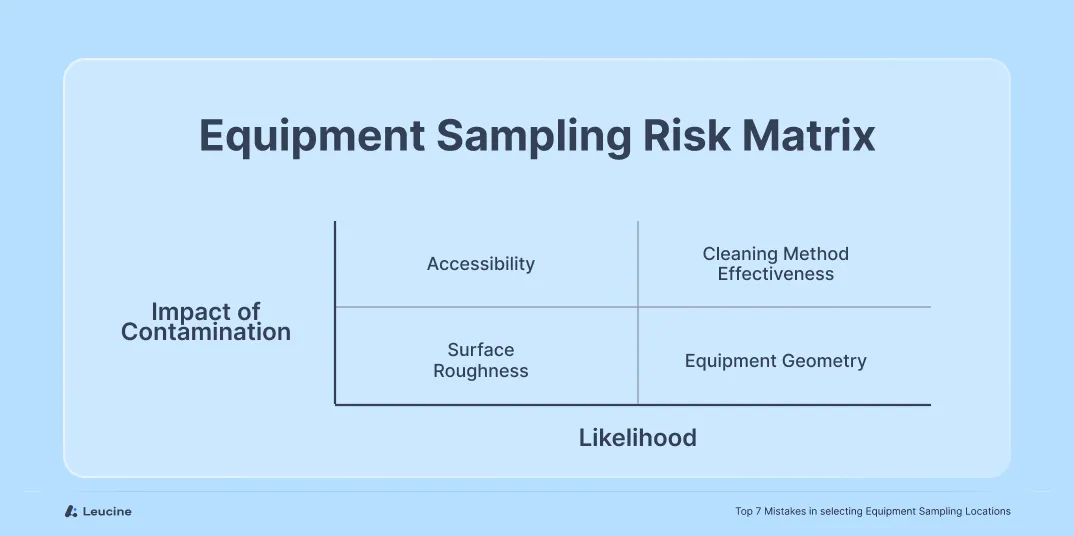
Best Practice:
Implementing a structured risk matrix that considers factors like dismantling complexity and residue detectability can help identify 'hard-to-clean' areas. This approach ensures adherence to Maximum Safe Carryover (MSC) standards, as required by regulatory bodies like the FDA (21 CFR 211.67).
Looking to standardize risk assessments and sampling plans across teams? Explore Leucine’s Cleaning Validation Software →
Mistake #2: Inadequate Sampling of Areas
In cleaning validation, sampling from “easy-to-reach” or visibly clean areas might seem efficient—but it defeats the purpose. Regulators expect you to sample from worst-case locations: the parts of your equipment most likely to retain residue or resist cleaning.
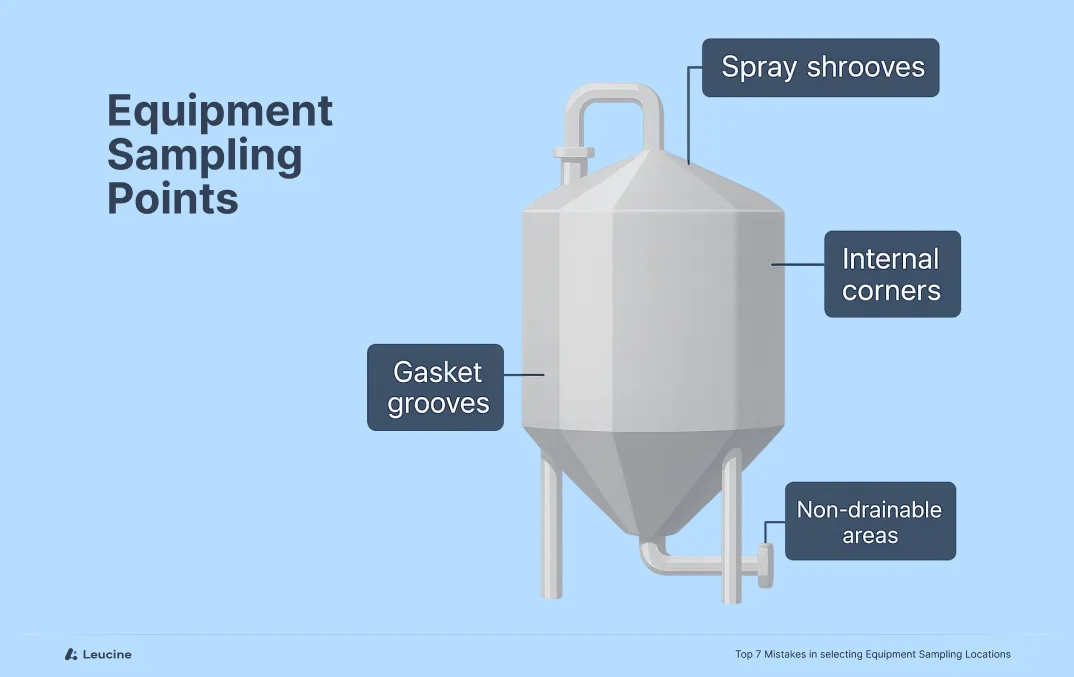
Common worst-case areas include:
- Narrow crevices or corners
- Gasket grooves or valves
- Spray shadow zones
- Non-drainable low points
Ignoring these high-risk spots can result in incomplete validation, making your process vulnerable to audit findings and, worse, cross-contamination.
Best Practice: Use statistical models to determine the appropriate number of sampling points. Employ formulas that incorporate confidence levels and margin of error to ensure representative sampling across the equipment. Ensure that the selected points cover worst-case areas in terms of cleanability and risk. Use risk assessment tools like FMEA or HACCP to justify worst-case selections.
Neglecting to sample adequately can invalidate your cleaning validation efforts. The extent of sampling is critical—not just in quantity but in how representative the sampling locations are across equipment surfaces.
To address this, a statistical formula is often used to determine the required number of samples for confidence in cleaning effectiveness:

Where:
- N = required sample size
- e = margin of error
- z = z-score (based on desired confidence level)
This formula helps ensure that the number of samples is sufficient to statistically verify the cleanliness of equipment surfaces, reducing the risk of false assurance.
Understand sampling location strategy within FDA’s Six System Model—visit our Resource Hub.
Best Practice:
Apply the formula when determining sampling points across complex equipment, especially for large or multi-surface systems. Align your confidence level (e.g., 95%) with your quality risk management thresholds, and ensure sample points cover worst-case and hard-to-clean areas.
📊 Want to automate statistical calculations and sampling plan documentation? Streamline your approach with Leucine’s Cleaning Validation Software →
Mistake #3: Overlooking Indirect Product Contact Surfaces
A common blind spot in cleaning validation is the assumption that only direct product contact surfaces require sampling. However, surfaces like lyophilizer shelves, chamber walls, or transfer chutes—although not directly in contact with the product—can still lead to contamination through proximity or airflow.
Best Practice:
Treat indirect contact surfaces with the same level of scrutiny as direct ones. Conduct risk assessments to determine their impact on product safety and include them in your sampling plan if they present a credible contamination pathway.


Mistake #4: Overreliance on Rinse Samples Without Swab Assessment
While rinse sampling is a convenient and non-invasive method, relying on it exclusively can leave critical contamination risks unaddressed. Many teams use only rinse samples under the assumption that if no residue is detected in the rinse, the equipment must be clean. However, this assumption can be misleading.
Rinse sampling reflects the cleanliness of the equipment surface only to the extent that residues are soluble and are successfully carried away by the rinsing agent. Some residues may adhere to the surface, reside in micro-crevices, or fail to dissolve adequately, making them undetectable through rinse alone.
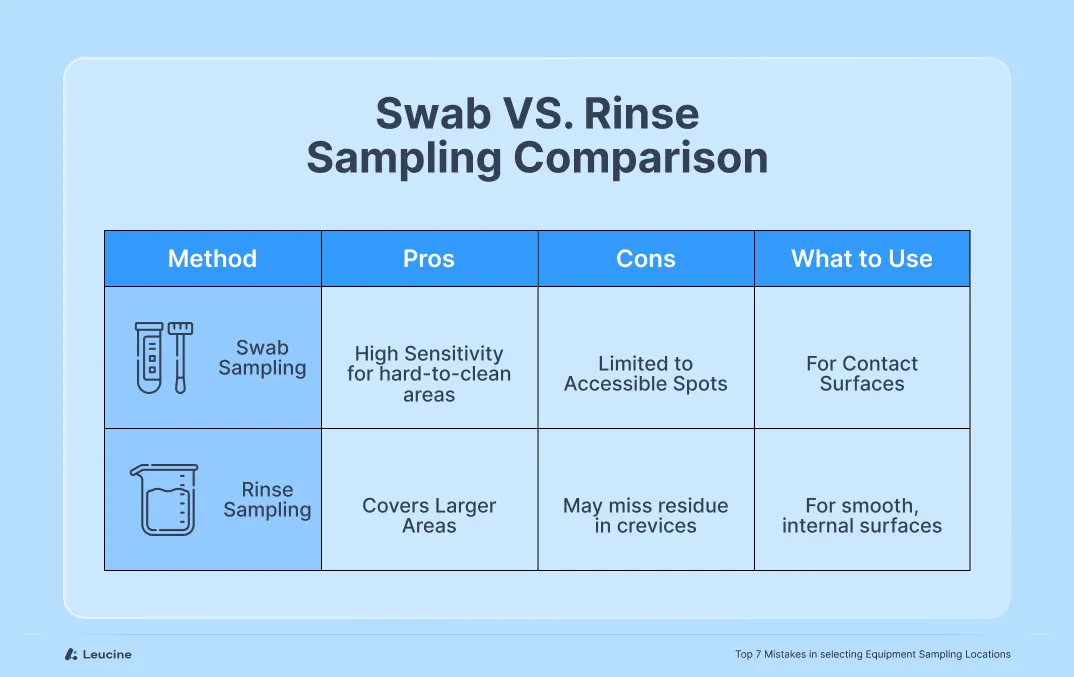
Swab sampling, on the other hand, involves direct contact with a defined surface area and is more effective at detecting residuals in hard-to-clean zones—particularly non-volatile or poorly soluble compounds.
Best Practice:
Use a combination of rinse and swab sampling for comprehensive coverage. Swabs are ideal for worst-case locations such as crevices, joints, valves, and gaskets where residues may be retained. Rinse samples are better suited for larger, more accessible surface areas. Validate both methods for recovery efficiency and ensure they meet sensitivity requirements for the compounds involved.
🧪 Looking to document and manage both rinse and swab sampling strategies in one platform? Leucine’s Cleaning Validation Software simplifies multi-method validation →
Mistake #5: Not Accounting for Variations in Material Construction
It’s a common error to assume that a validated cleaning process for one equipment surface material will automatically apply to all others. However, different materials have different surface energies, porosities, and interactions with product residues and cleaning agents.
For instance, stainless steel (often 316L) may exhibit excellent cleanability, but components made of rubber, plastic, or polymers like PTFE can retain residues differently due to absorption or rougher surface texture. If your sampling locations only represent one material type, your validation data may not reflect the worst-case scenario.
Best Practice:
Identify and assess all material types in product contact and adjacent areas. Choose sampling points that represent the most difficult-to-clean surfaces among them. Where applicable, validate material-specific recovery factors and cleaning agent compatibility, especially for elastomers and polymers.
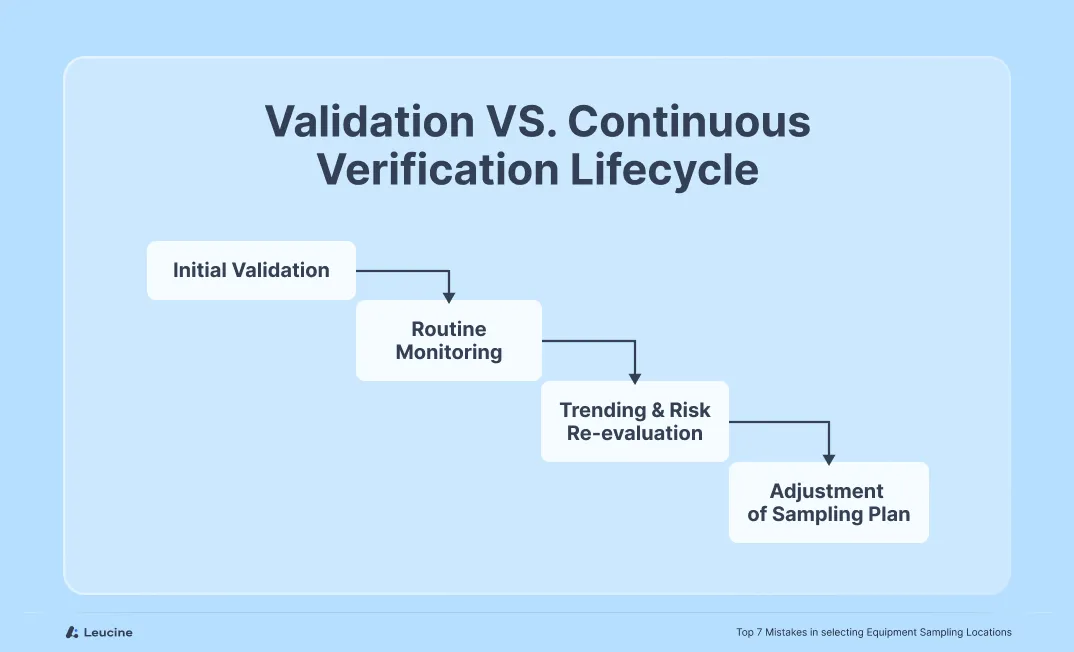
Mistake #6: Using the Same Sampling Plan for Validation and Continued Verification
A frequent oversight is using the exact same sampling locations and rationale from the initial validation phase for ongoing monitoring or periodic verification. While the validation plan is designed to assess the worst-case scenario, continued verification serves a different purpose: confirming the routine process remains in control over time.
What qualifies as worst-case during validation (e.g., most difficult-to-clean location) might not be operationally feasible to sample regularly during batch-to-batch verification. Over time, equipment performance, cleaning agents, or manufacturing conditions may change—rendering static sampling plans outdated.
Best Practice:
Differentiate between initial validation and continued verification. During validation, focus on worst-case surfaces, but for routine monitoring, apply a risk-based, rotating strategy that maintains control while considering feasibility. Document the rationale and update plans based on process changes or trend deviations.
Mistake #7: Inconsistent Risk Assessment Practices Across Teams or Sites
In large organizations or multi-site operations, inconsistent risk assessment methodologies can lead to discrepancies in sampling point selection—even for identical equipment. This misalignment can raise questions during audits and compromise data comparability.
For example, one site may use a documented FMEA-based matrix, while another relies on informal judgment. Without a harmonized approach, it becomes difficult to enforce standards, audit-proof decisions, or benchmark performance across the organization.
Best Practice:
Standardize your risk assessment methodology across teams, sites, and geographies. Use consistent scoring systems, documentation templates, and decision criteria. Establish central review mechanisms to ensure uniformity and align sampling rationale with company-wide policies.
Harmonize validation across teams with Leucine’s centralized workflows and templates. Scale compliance globally with Leucine’s Cleaning Validation .
Frequently Asked Questions